Guide On Setting Up Proxmox Backup Server (PBS)
Introduction –
Proxmox Backup Server (PBS) is an enterprise-grade backup solution that is ideal for backing up virtual machines, containers, and physical hosts. In this guide, we will walk through the steps to install and configure PBS, utilizing a separate NAS server with a 4TB storage space configured in RAIDz2 on TrueNAS for our backups.
System Requirements
Before diving into the installation, it’s essential to ensure your hardware meets the necessary requirements. Here’s a breakdown of the minimum and recommended specifications:
- CPU: Minimum 2 cores (64-bit, x86-64 or AMD64), Recommended 4 cores or more.
- Memory (RAM): Minimum 2 GB, Recommended 4 GB or more, with an additional 1 GB for every TB of storage.
- Hard Drive:
- OS Storage: Minimum 8 GB, Recommended 32 GB or more.
- Backup Storage: A separate NAS server, running TrueNAS, UNRAID, etc…
- Network Card (NIC): Redundant Multi-GBit/s network interface cards (NICs) are recommended for production environments.
These specifications ensure that your Proxmox Backup Server operates efficiently, with ample resources to manage backups and restorations effectively.
Given the hardware intensity of backup operations, selecting a robust server is crucial. The Dell PowerEdge R620 Server or the Dell PowerEdge T320 are renowned for their reliability in virtualization environments, making it an excellent choice for your Proxmox setup
Downloading the Proxmox Backup Server ISO
Download the Proxmox Backup Server ISO from the Proxmox Downloads page. This ISO contains everything necessary for the installation. Storing your downloaded ISOs securely is as important as the download itself. Consider using an external hard drive like the Toshiba Canvio Basics 2TB Portable External Hard Drive USB for all your software storage needs, ensuring safety and accessibility.
Uploading the ISO to Proxmox Server Instance
- Login to your Proxmox VE (Virtual Environment).
- Navigate to the Storage view, select your storage, and click on the Upload button.
- Browse to the location of the Proxmox Backup Server ISO you downloaded and select it to upload.
Installation
After uploading the ISO, proceed to install PBS on a VM:
- Navigate to Datacenter > Proxmox VE Nodes.
- Right-click on your node and select Create VM.
- In the General tab:
- Name: Enter a name for your VM (e.g., ProxmoxBackupServer).
- In the OS tab:
- ISO image: Select the Proxmox Backup Server ISO from the dropdown.
- Follow through the rest of the VM creation wizard with your preferred settings or default settings.
- Once the VM is created, select it from the left-hand panel and click on Start at the top.
- Click on Console to view the VM’s screen.
- Disable secure boot temporarilty on the VM by pressing Esc during the boot process. Make sure to re-enable secure boot after the installation is complete.
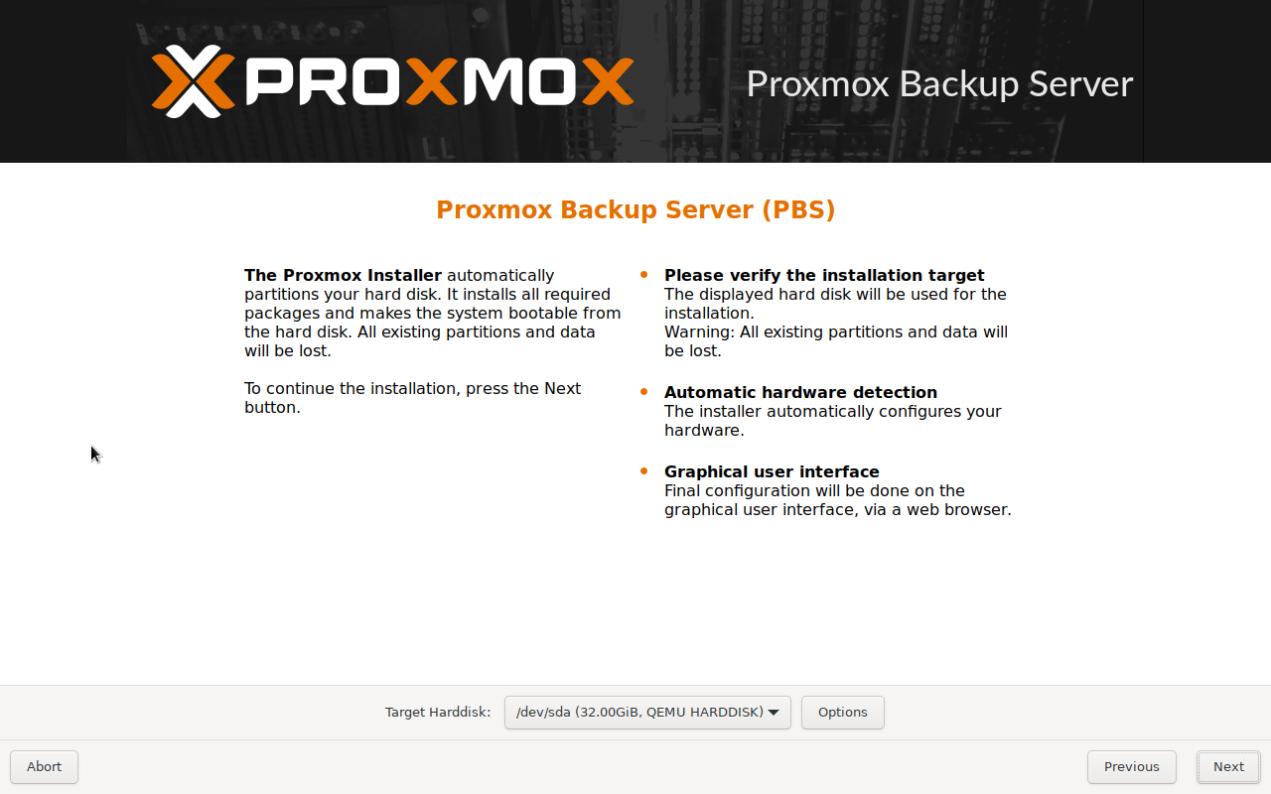
- The Proxmox Backup Server Installer will load. Follow the on-screen instructions to install Proxmox Backup Server.
- Configure the proxmox hard disk. Default values should be good for most cases.
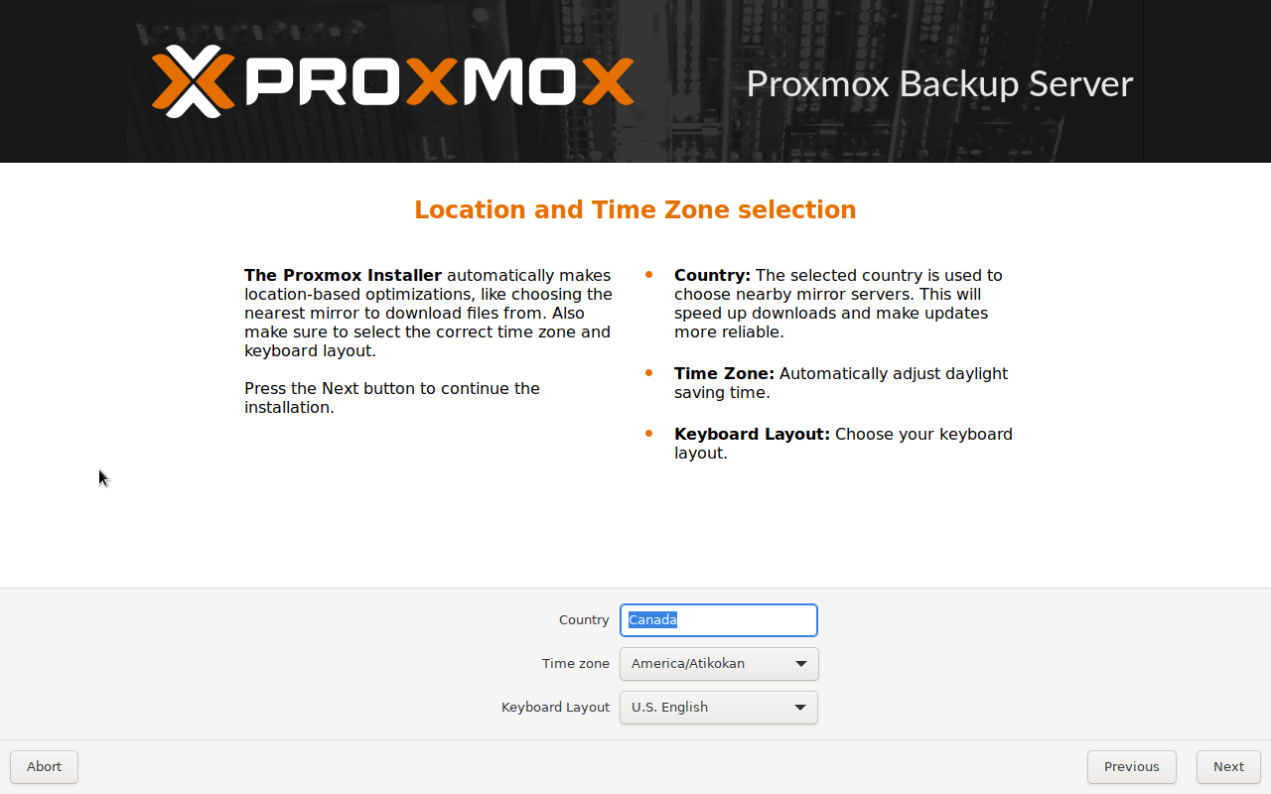
- Choose your preferred language, time zone and country settings.
- Enter a password for the administrative user (
root).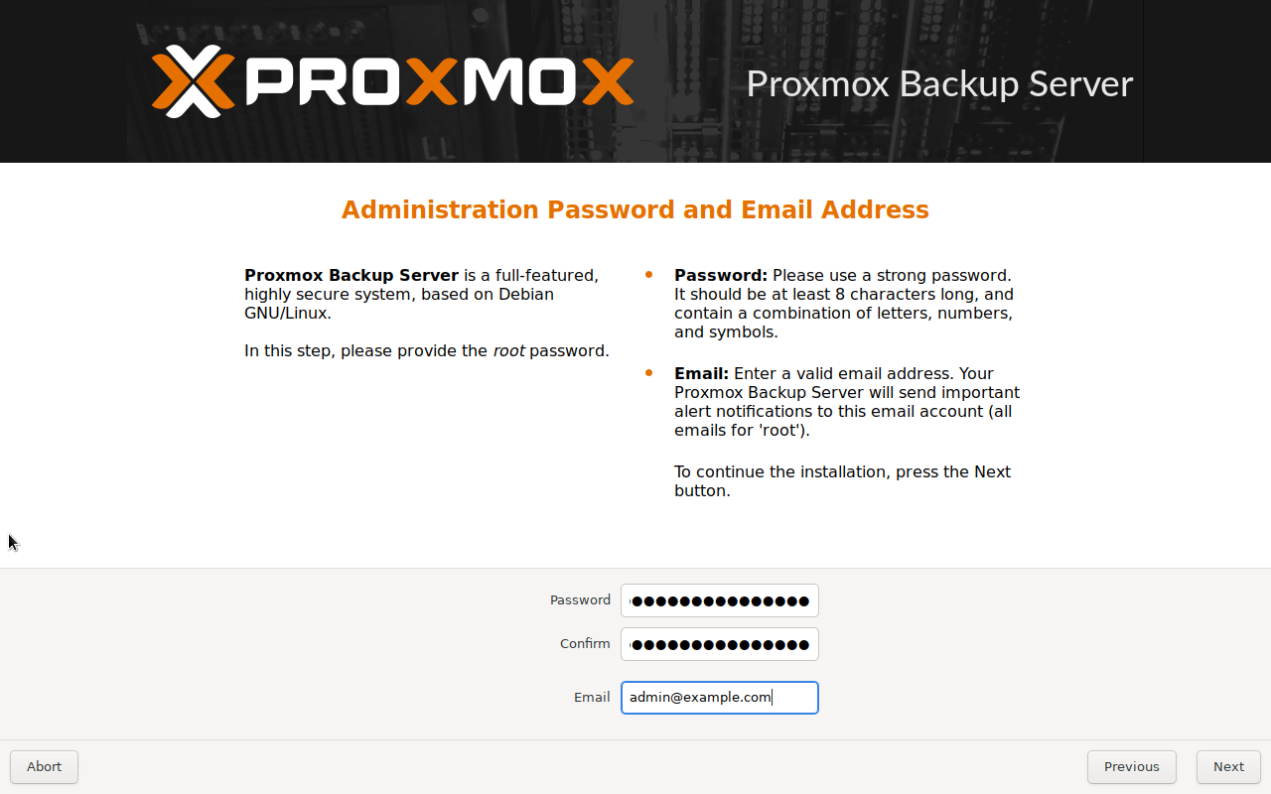
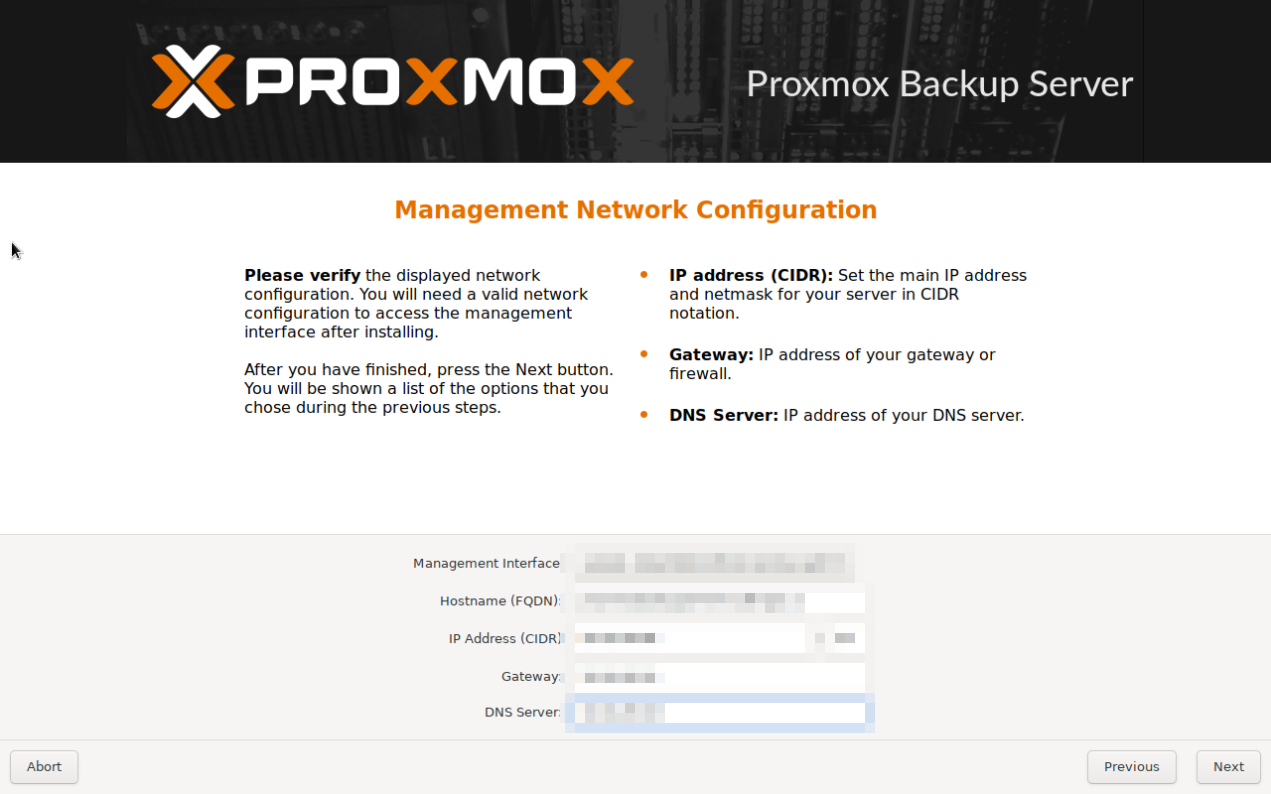
- Configure your network settings.
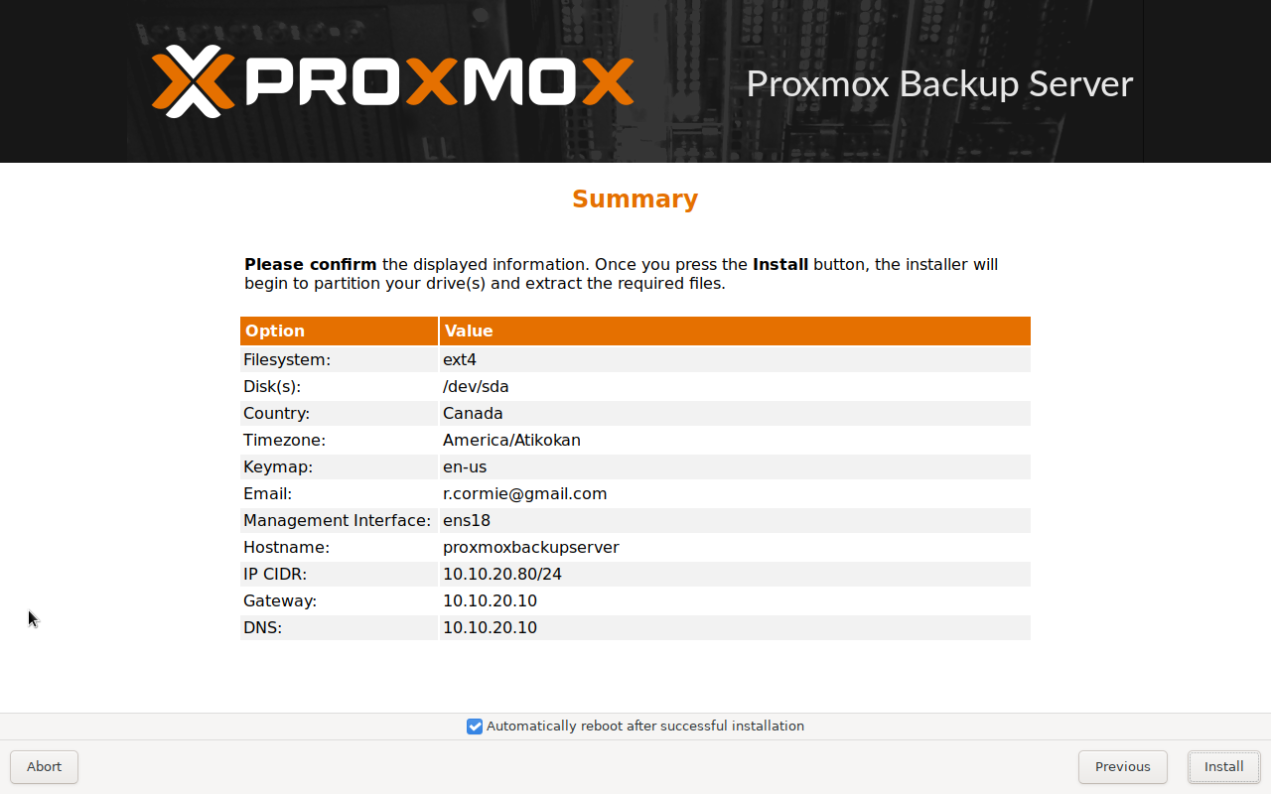
- Finally, click Install. The installer will proceed to install Proxmox Backup Server on your VM.
- Configure the proxmox hard disk. Default values should be good for most cases.
Configuring Proxmox Backup Server
Once installed, access the Proxmox Backup Server web interface via your web browser at https://<Your-VM-IP-Address>:8007.
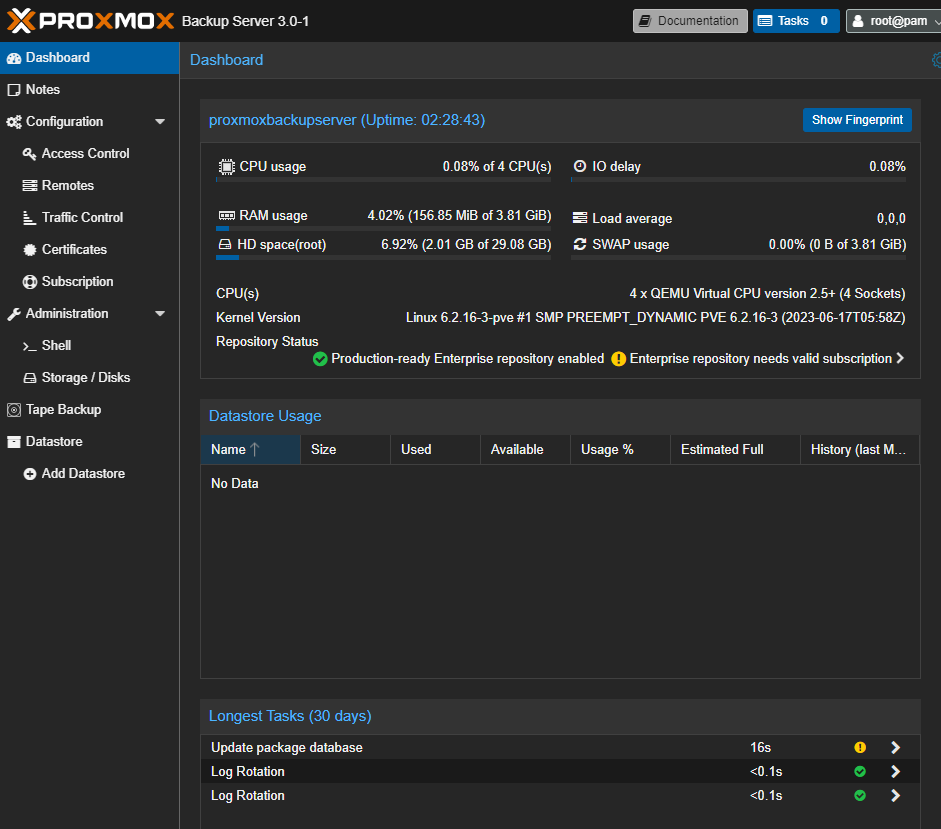
- Login using the username
rootand the password you set during the installation. - Familiarize yourself with the dashboard layout.
Your Proxmox Backup Server is now ready to back up and restore data. It’s generally advisable to use a separate NAS server for backups to ensure data integrity and availability. For further information and advanced configurations, consult the Proxmox Backup Server documentation and the datasheet provided earlier.
Setting Up Backups
After successfully installing and configuring Proxmox Backup Server, the next step is to set up backups for your virtual machines, containers, or physical hosts. Here’s a step-by-step guide:
1. Accessing the Web Interface:
- Access the Proxmox Backup Server web interface via your browser at
https://<Your-Server-IP-Address>:8007. - Log in using the username
rootand the password you set during installation.
2. Creating a Datastore:
- Navigate to the Datacenter tab on the left pane.
- Click on Storage, then on the Add button to create a new datastore.
- Give your datastore a name, and choose the storage pool you created earlier.
- Click Add to create the datastore.
3. Configuring Backup Jobs:
- Go to your Proxmox VE instance.
- Navigate to the Datacenter tab, then Backup.
- Click on Add to create a new backup job.
- Select the node and the VM(s) or container(s) you want to back up.
- Choose the Backup Server and the Datastore you created earlier.
- Set your backup schedule, e.g., daily at 2 AM.
- Click Create to create the backup job.
Your backup job is now set, and your VMs or containers will be backed up according to the schedule you set.
Restoring From Backups
Restoring data is a straightforward process with Proxmox Backup Server. Here’s how you can restore data from your backups:
1. Accessing Backups:
- Access the Proxmox Backup Server web interface.
- Go to the Datastore tab, then click on the datastore containing your backups.
- You’ll see a list of backups. Click on the one you want to restore.
2. Restoring a VM or Container:
- In the backup details page, click on the Restore button.
- Select the Proxmox VE node and storage where you want to restore the VM or container.
- Optionally, you can change the VM ID and name.
- Click Restore to start the restoration process.
4. Verifying the Restoration:
- Once the restoration process is complete, go to your Proxmox VE instance.
- Verify that the VM or container has been restored correctly and that all data is intact.
The Proxmox Backup Server provides a reliable and efficient way to back up and restore your data, ensuring that you can quickly recover in the event of data loss.
This guide has provided you with a basic understanding of how to set up backups and restore data using Proxmox Backup Server. For more advanced configurations or troubleshooting, refer to the official Proxmox Backup Server documentation.